CSS3 Skeleton Screen

linear-gradient로 skeleton screen 만들어보기

페이스북이나 유튜브의 첫 화면을 보면, 아주 잠깐 프레임을 그려주는 빈 페이지를 확인할 수 있다.
이러한 페이지를 개발에서 skeleton screen(스켈레톤 스크린) 이라고 한다.
참고로 skeleton은 뼈대를 의미의 단어를 뜻한다. skeleton screen을 적용하면 사용자가 “대기중”이라는 느낌을 전달하면서 빠르게 로드되고 있다고 인식하게 합니다.

그럼 이러한 UI는 어떤 방법으로 구현할 수 있을까?
CSS의 linear-gradient 속성과 :empty 선택자를 활용하여 이를 구현해 보도록 하겠다.
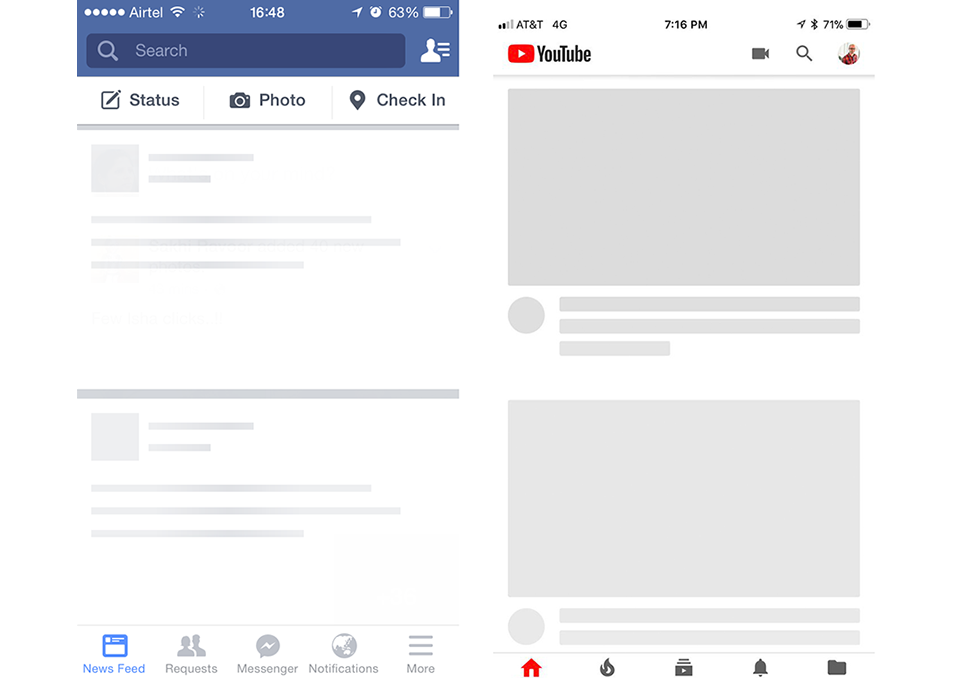
페이스북, 유튜브 seleton-screen 화면

1. linear-gradient 원리

linear-gradient의 기본 문법은 아래와 같다.

1
2
linear-gradient(angle, color-stop1, color-stop2); /* 선형 */
radial-gradient(shape size at position, start-color, ..., last-color); /* 원형 */

선형을 적용해보면, 방향과 적용 컬러를 순서대로 선언하게 된다. 방향 to bottom은 기본 값으로 생략이 가능하다.

1
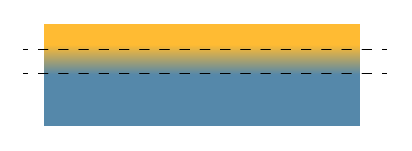
linear-gradient(to bottom, yellow 20%, steelblue 50%)

linear-gradient 결과화면1

보통은 부드럽게 컬러가 변할 때 많이 쓰는 속성이지만, 경계면이 매끄럽게 떨어지도록 만드는 방법도 있다.
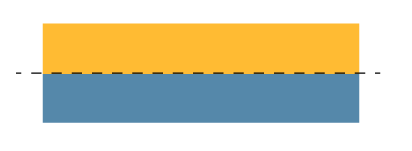
첫 번째와 두 번째 위치값이 동일할 경우, 경계선이 만나면서 그라데이션 영역이 사라지므로 아래와 같이 단색 면이 된다.

1
linear-gradient(yellow 50%, steelblue 50%)

linear-gradient 결과화면2

또한 두 번째 값이 첫 번째의 값보다 클 때(더 위쪽에 위치할 때) 도 브라우저는 동일하게 동작하는데,
두 번째 위치를 0으로 잡았다면 그 위치는 브라우저에 의해 이전 색상 정지의 위치와 같게 그 위치가 조정된다.

1
linear-gradient(yellow 50%, steelblue 0) = linear-gradient(yellow 50%, steelblue 50%)

두 번째 값이 투명할 경우에는? 첫 번째 색으로만 표현된다.

1
linear-gradient(yellow 50%, transparent 0)

linear-gradient 결과화면3

이러한 속성을 활용하면 하나의 div에 background-image로 도형을 드로잉해 볼 수 있다.

2. linear-gradient를 활용한 도형 드로잉

linear-gradient 실습 예제

background-image 속성은 <image> <position> <size>의 값을 주어서 컨트롤할 수 있다.

1) background-image : 멀티 배경 지정

background-image 속성은 여러 배경 이미지를 추가할 수 있다 .
서로 다른 배경 이미지는 쉼표로 구분되며 이미지는 서로 위에 겹쳐서 표시된다.
원형 1개, 사각형 4개를 그리기 위해서 5번 선언해 주었고, y축으로 반복할 수 있게 repeat-y를 주었다.

1
2
3
4
5
6
7
8
background-image:
radial-gradient( circle 50px at 50px 50px, gray 99%, transparent 0 ), /* 원형 */
linear-gradient( lightgray 20px, transparent 0 ), /* 사각1 */
linear-gradient( lightgray 20px, transparent 0 ), /* 사각2 */
linear-gradient( lightgray 20px, transparent 0 ), /* 사각3 */
linear-gradient( lightgray 20px, transparent 0 ); /* 사각4 */

background-repeat: repeat-y;

샘플) sceleton-step1

1
<div class="skeleton-screen"></div>
1
2
3
4
5
6
7
8
9
10
11
12
13
14
15
16
17
18
19
20
.skeleton-screen{
margin: auto;
width: 500px;
height: 500px;
background-image:
radial-gradient( circle 50px at 50px 50px, lightgray 100%, transparent 0 ),
linear-gradient( lightgray 20px, transparent 0 ),
linear-gradient( lightgray 20px, transparent 0 );

background-image:
-webkit-radial-gradient( 50px 50px, circle cover, lightgray 50px, transparent 0 ),
-webkit-linear-gradient( lightgray 20px, transparent 0 ),
-webkit-linear-gradient( lightgray 20px, transparent 0 );

background-repeat: repeat-y;
}

2) background-position : 위치 지정

겹쳐 있는 각 도형의 위치를 x축, y축으로 재지정 해준다.

1
2
3
4
5
6
background-position: 
0 0, /* 원형 */
120px 0, /* 사각1 */
120px 40px, /* 사각2 */
120px 80px, /* 사각3 */
120px 120px; /* 사각4 */

3) background-size : 사이즈 지정

각 도형에 원하는 사이즈 width, height 값을 지정해다.

1
2
3
4
5
6
background-size:
100px 200px, /* 원형 */
150px 200px, /* 사각1 */
350px 200px, /* 사각2 */
300px 200px, /* 사각3 */
250px 200px; /* 사각4 */

샘플) sceleton-step2

1
<div class="skeleton-screen"></div>
1
2
3
4
5
6
7
8
9
10
11
12
13
14
15
16
17
18
19
20
21
22
23
24
25
26
27
28
29
30
31
32
33
34
35
.skeleton-screen{
margin: auto;
width: 500px;
height: 500px;

background-image:
radial-gradient( circle 50px at 50px 50px, lightgray 100%, transparent 0 ),
linear-gradient( lightgray 20px, transparent 0px ),
linear-gradient( lightgray 20px, transparent 0 ),
linear-gradient( lightgray 20px, transparent 0 );

background-image:
-webkit-radial-gradient( 50px 50px, circle cover, lightgray 50px, transparent 0 ),
-webkit-linear-gradient( lightgray 20px, transparent 0 ),
-webkit-linear-gradient( lightgray 20px, transparent 0 );

background-repeat: repeat-y;

background-size:
100px 200px,
150px 200px,
350px 200px,
300px 200px,
250px 200px;

background-position:
0 0,
120px 0,
120px 40px,
120px 80px,
120px 120px;
}

4) animation 레이어 추가

빛이 지나가는 듯한 움직임을 위해 흰색 그라데이션의 이미지와 keyframe animation을 추가하면 효과를 표현할 수 있다.
다만 주의할 점은, multi background의 경우에 쌓임맥락은 z-index와 약간 다르다는 점이다. (참고 : stacking-order-of-multiple-backgrounds)
하나의 요소 안에서 이루어지기 때문에 먼저 선언할수록 위쪽으로 쌓이게 되는데, 지금까지 만든 도형보다 위쪽에 레이어를 선언해주면 된다.

1
2
3
4
5
6
7
8
9
10
11
12
13
14
15
16
17
18
19
20
21
22
23
background-image:
linear-gradient( 100deg, rgba(255, 255, 255, 0), rgba(255, 255, 255, 0.5) 50%, rgba(255, 255, 255, 0) 80% ), /* animation */
radial-gradient( circle 50px at 50px 50px, gray 99%, transparent 0 ), /* 원형 */
linear-gradient( lightgray 20px, transparent 0 ), /* 사각1 */
linear-gradient( lightgray 20px, transparent 0 ), /* 사각2 */
...

background-size:
50px 200px, /* animation */
100px 200px, /* 원형 */
150px 200px, /* 사각1 */
350px 200px, /* 사각2 */
...
```

**5) :empty 선택자 활용**

데이터가 들어오기 전에 빈 태그 상태를 :empty 선택자로 선택할 수 있다.
:empty는 자식(텍스트 노드 포함)이 전혀 없는 요소에 적용하는 선택자이다.
데이터 로딩 이전에 태그를 그리지 않은 상태일 경우에 활용 가능하다.

``` css
.skeleton-screen:empty {}

샘플) sceleton-step3

1
<div class="skeleton-screen"></div>
1
2
3
4
5
6
7
8
9
10
11
12
13
14
15
16
17
18
19
20
21
22
23
24
25
26
27
28
29
30
31
32
33
34
35
36
37
38
39
40
41
42
43
44
45
46
47
48
49
50
51
52
53
.skeleton-screen:empty{
margin: auto;
width: 500px;
height: 500px;

background-image:
linear-gradient( 100deg, rgba(255, 255, 255, 0), rgba(255, 255, 255, 0.5) 50%, rgba(255, 255, 255, 0) 80% ), /* highlight */
radial-gradient( circle 50px at 50px 50px, lightgray 100%, transparent 0 ),
linear-gradient( lightgray 20px, transparent 0 ),
linear-gradient( lightgray 20px, transparent 0 );

background-image:
-webkit-linear-gradient( 100deg, rgba(255, 255, 255, 0), rgba(255, 255, 255, 0.5) 50%, rgba(255, 255, 255, 0) 80% ),
-webkit-radial-gradient( 50px 50px, circle cover, lightgray 50px, transparent 0 ),
-webkit-linear-gradient( lightgray 20px, transparent 0 ),
-webkit-linear-gradient( lightgray 20px, transparent 0 );

background-repeat: repeat-y;

background-size:
50px 200px, /* highlight */
100px 200px,
150px 200px,
350px 200px,
300px 200px,
250px 200px;

background-position:
120px 0, /* highlight */
0 0,
120px 0,
120px 40px,
120px 80px,
120px 120px;

animation: shine 1s infinite;
}

@keyframes shine {
to {
background-position:
100% 0, /* move highlight to right */
0 0,
120px 0,
120px 40px,
120px 80px,
120px 120px;
}
}

3. 장점 및 활용범위

단 하나의 태그에서 CSS 만으로 그려질 수 있다는 점에서 코드가 간단하며 변형 및 확장이 용이하다.
또한 background-image 속성은 렌더링 시, layout 변동 없이 paint, composite 과정만 거치기 때문에 성능적으로도 이점이 있을 것으로 보인다.
이를 응용하면 CSS를 활용한 패턴 제작로딩아이콘, 차트 등의 다양한 드로잉도 시도해 볼 수 있다.
background-image 속성의 브라우저 범위는 IE10 이상으로, 대응 범위를 확인하여 문법을 작성해야 하며 -webkit-, -moz-, -ms- and -o-의 벤더 프리픽스를 필요로 한다.
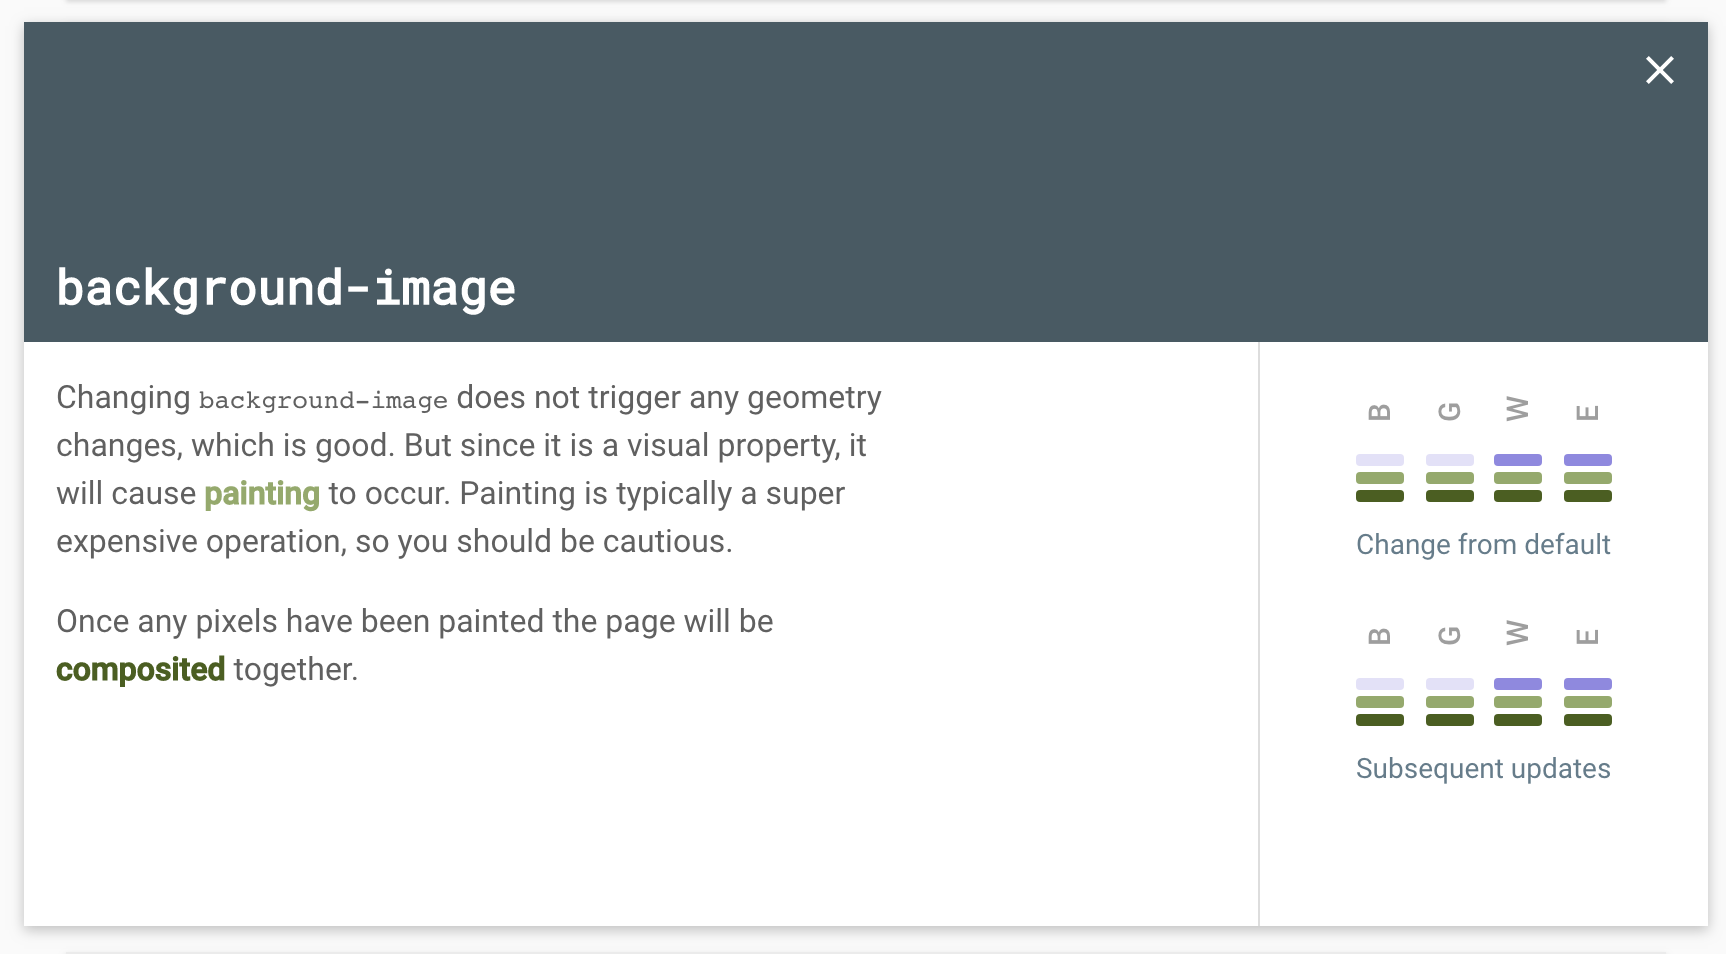
background-image 렌더링 성능

참조

공유하기