React.js Component Iteration (반복) – Map
React.js 에서 다른 데이터를 지니고있는 같은 종류의 여러 컴포넌트를 효율적으로 렌더링 하는 방법에 대하여 알아보도록 하겠다.
1. JavaScript – Array.prototype.map
우선, JavaScript 의 Array 객체 내장함수인 map 함수에 대하여 알아보자.
정의
map() 메소드는 파라미터로 전달 된 함수를 통하여 배열 내의 각 요소를 프로세싱 하여 그 결과로 새로운 배열을 생성한다.
문법
1
| arr.map(callback, [thisArg]);
|
파라미터
callback 새로운 배열의 요소를 생성하는 함수로서, 다음 세가지 인수를 가진다.
- currentValue 현재 처리되고 있는 요소
- index 현재 처리되고 있는 요소의 index 값
- array 메소드가 불려진 배열
- thisArg (선택항목) callback 함수 내부에서 사용 할 this 값을 설정
예제
배열 [1, 2, 3, 4, 5] 의 각 요소를 제곱하여 새로운 배열을 생성하는 예제를 살펴보자.
1
2
3
4
5
6
7
| var numbers = [1, 2, 3, 4, 5];
var processed = numbers.map(function(num) {
return num*num;
});
|
위 코드를 ES6 문법으로 작성하면 다음과 같습니다.
1
2
3
| let numbers = [1, 2, 3, 4, 5];
let result = numbers.map((num) => {return num*num});
|
이 코드에서 사용된 ( ) => { } 은 ES6 에 새로 도입된 arrow function 이다.
자세한 설명은 Mozilla 참고자료를 참조하자.
2. 컴포넌트 mapping
이번엔 데이터 배열을 mapping 하여 컴포넌트 배열로 변환하는 과정을 살펴보도록 하겠다.
React.js 작업환경이 설정되었다는 가정하에 진행하도록 한다. 편의상 컴포넌트들을 App.js에 모두 작성한다.
src/components/App.js
1
2
3
4
5
6
7
8
9
10
11
12
13
14
15
16
17
18
19
20
21
22
23
24
25
26
27
28
| import React from 'react';
class App extends React.Component {
render(){
return (
<Contacts/>
);
}
}
class Contacts extends React.Component {
render() {
return (
<div>
<h1>Contacts</h1>
<ul>
<li>Abet 010-0000-0001</li>
<li>Betty 010-0000-0002</li>
<li>Chalie 010-0000-0003</li>
<li>David 010-0000-0003</li>
</ul>
</div>
);
}
}
export default App;
|
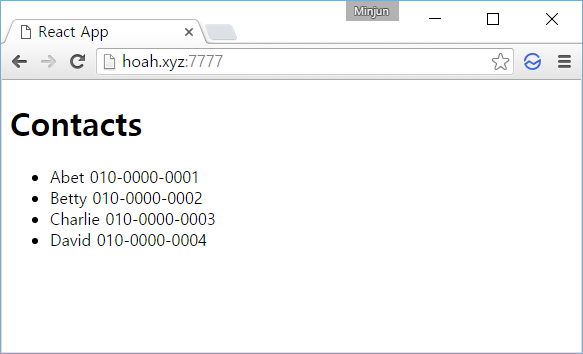
위의 코드는 전화번호부 기능을 하는 예제 컴포넌트 이다.
19-22번줄, 비슷한 코드가 반복되고 있다. 지금 당장은 큰 문제가 없지만, 저기에 나올 데이터가 유동적이라면 그때그때 하드코딩 하게 될 것이다. 이 문제점을 React 스럽게 해결해보도록 하자.
ContactInfo 클래스 생성 (Contacts 클래스 하단)
1
2
3
4
5
6
7
| class ContactInfo extends React.Component {
render() {
return (
<li>{this.props.name} {this.props.phone}</li>
);
}
}
|
이름과 전화번호가 나타날 부분에 props 를 사용하였다.
Contacts 컴포넌트 렌더링 부분 수정
1
2
3
4
5
6
7
8
9
10
11
12
13
| render() {
return (
<div>
<h1>Contacts</h1>
<ul>
<ContactInfo name="Abet" phone="010-0000-0001"/>
<ContactInfo name="Betty" phone="010-0000-0002"/>
<ContactInfo name="Charlie" phone="010-0000-0003"/>
<ContactInfo name="David" phone="010-0000-0004"/>
</ul>
</div>
);
}
|
html 코드를 컴포넌트 형태로 변환하여 작성하였다.
아직 크게 달라진건 없다. 같은 코드를 반복해서 사용하는건 마찬가지이다.
2.3 mapping
데이터를 매핑해보도록 하자.
기본 state 추가 (Contacts 클래스 내부)
1
2
3
4
5
6
7
8
9
10
11
| constructor(props) {
super(props);
this.state = {
contactData: [
{name: "Abet", phone: "010-0000-0001"},
{name: "Betty", phone: "010-0000-0002"},
{name: "Charlie", phone: "010-0000-0003"},
{name: "David", phone: "010-0000-0004"}
]
};
}
|
state 는 컴포넌트에서 유동적인 데이터를 다룰 때 사용된다.
렌더링 부분 배열 mapping 으로 교체
1
2
3
4
5
6
7
8
9
10
11
12
| render() {
return (
<div>
<h1>Contacts</h1>
<ul>
{this.state.contactData.map((contact, i) => {
return (<ContactInfo name={contact.name} phone={contact.phone} key={i}/>);
})}
</ul>
</div>
);
}
|
9번 줄에서 key 가 사용되었는데, 이는 child 컴포넌트에 identity (독자성) 을 부여해준다.
최종 코드
1
2
3
4
5
6
7
8
9
10
11
12
13
14
15
16
17
18
19
20
21
22
23
24
25
26
27
28
29
30
31
32
33
34
35
36
37
38
39
40
41
42
43
44
45
| import React from 'react';
class App extends React.Component {
render() {
return (
<Contacts/>
);
}
}
class Contacts extends React.Component {
constructor(props) {
super(props);
this.state = {
contactData: [
{name: "Abet", phone: "010-0000-0001"},
{name: "Betty", phone: "010-0000-0002"},
{name: "Charlie", phone: "010-0000-0003"},
{name: "David", phone: "010-0000-0004"}
]
};
}
render() {
return (
<div>
<h1>Contacts</h1>
<ul>
{this.state.contactData.map((contact, i) => {
return (<ContactInfo name={contact.name} phone={contact.phone} key={i}/>);
})}
</ul>
</div>
);
}
}
class ContactInfo extends React.Component {
    render() {
        return (
            <li>{this.props.name} {this.props.phone}</li>
        );
    }
}
export default App;
|
출력물

참조
